Clarobi plugin for Shopware 6 installation
Follow the instructions bellow in order to install the plugin.
Step 1 - Installation
Add Clarobi plugin for Shopware 6
Plugin installation - recomanded method
Go to Shopware store and place and an order for our plugin (free).
Download zip - alternative method
Download the module by clicking here.
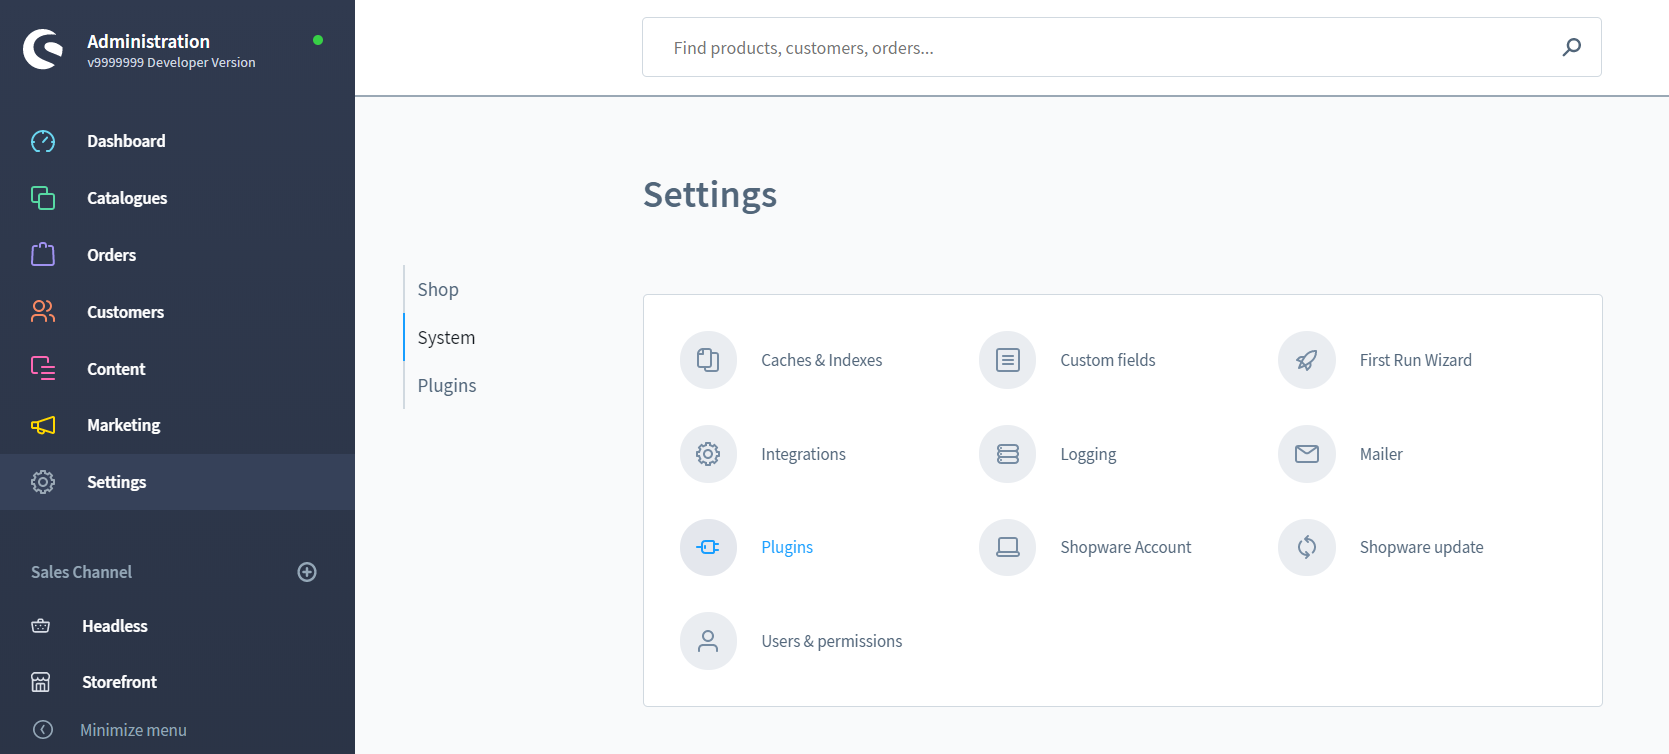
Go to Shopware 6 Admin → Settings → System → Plugins, click Upload plugin and choose the plugin zip folder.
Repo installation - alternative method
Go to Clarobi pluing repository for Shopware 6.
After accessing the repo you can choose to clone the repository or download the zip package.
Clone the repository:
Download the zip package:
- Click Clone or download → Download ZIP
- After the download is complete, unzip the folder and rename it to Clarobi
- Zip back the plugin folder.
- Login into Shopware 6 Admin and go to Settings → System → Plugins, click Upload plugin and choose the plugin zip folder.
Step 2 - Configuration
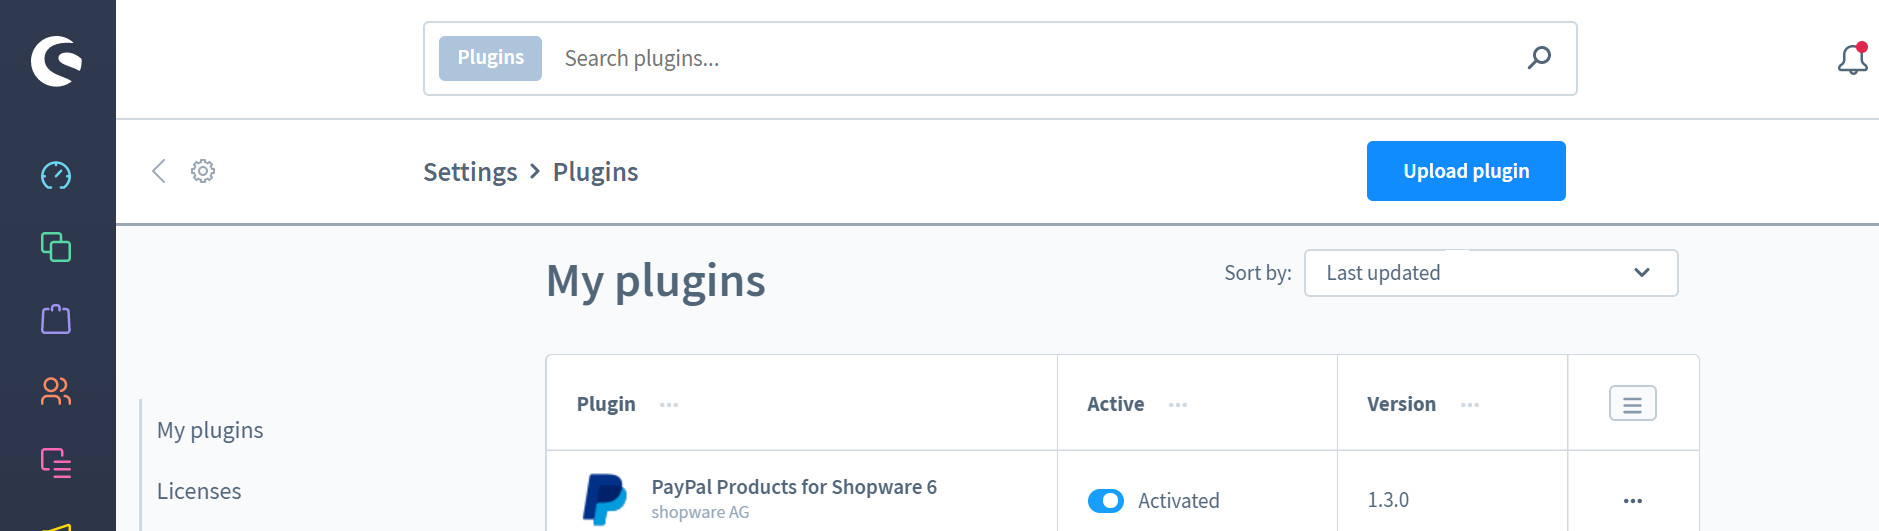
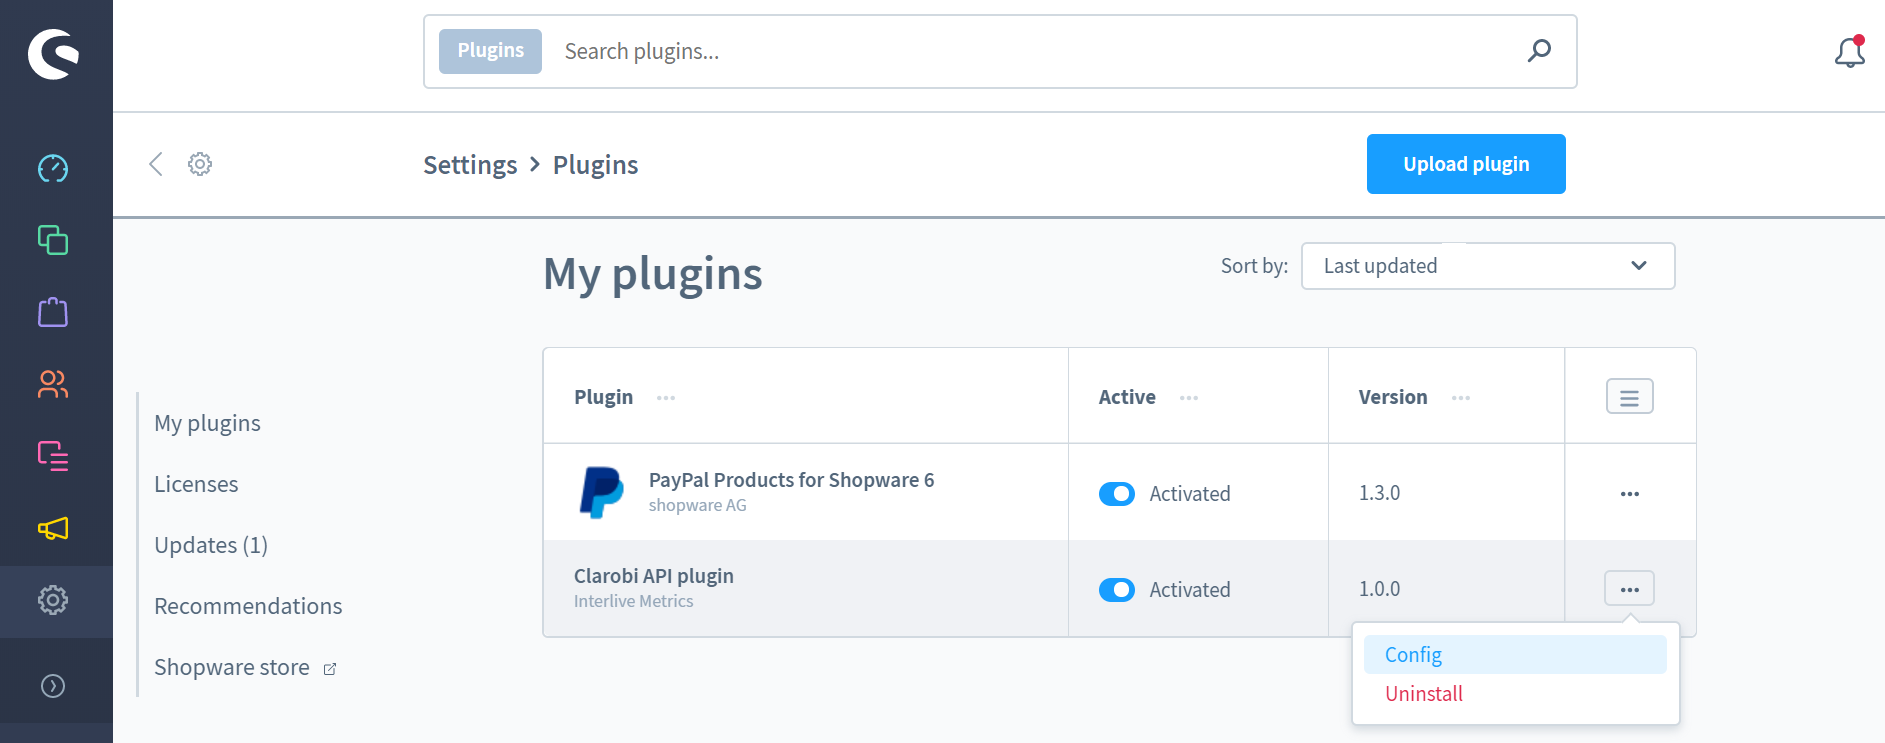
In Shopware 6 Admin under Settings → System → Plugins find the Clarobi plugin.
Click the toggle button next to Deactivated to change it into Activated.
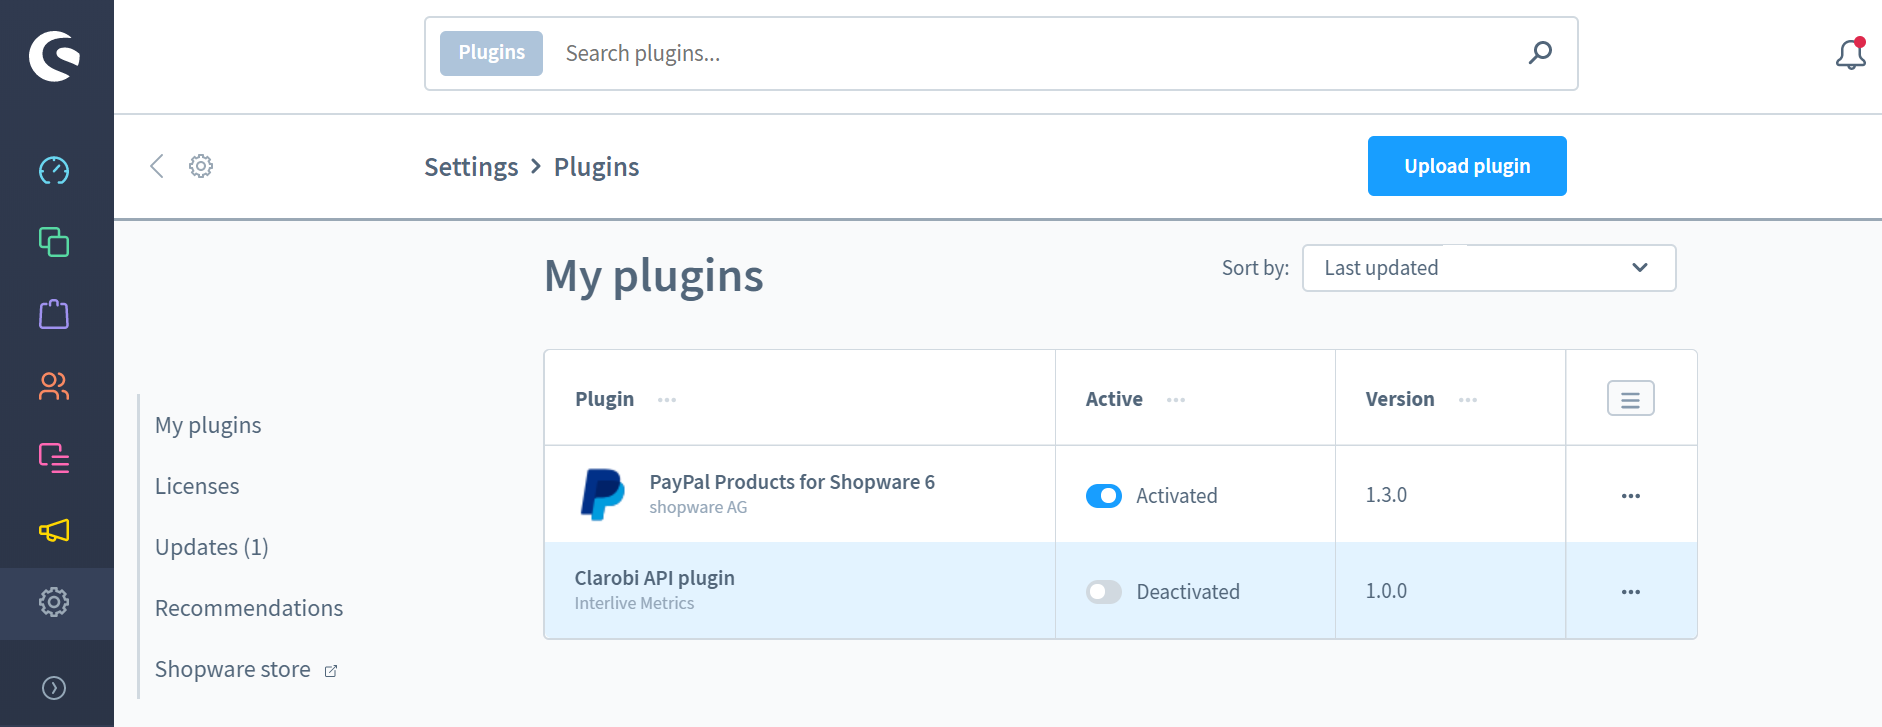
After the plugin was activated, click the 3 dots on the same row as pluging's name and click Config to open plugin's configuration page.
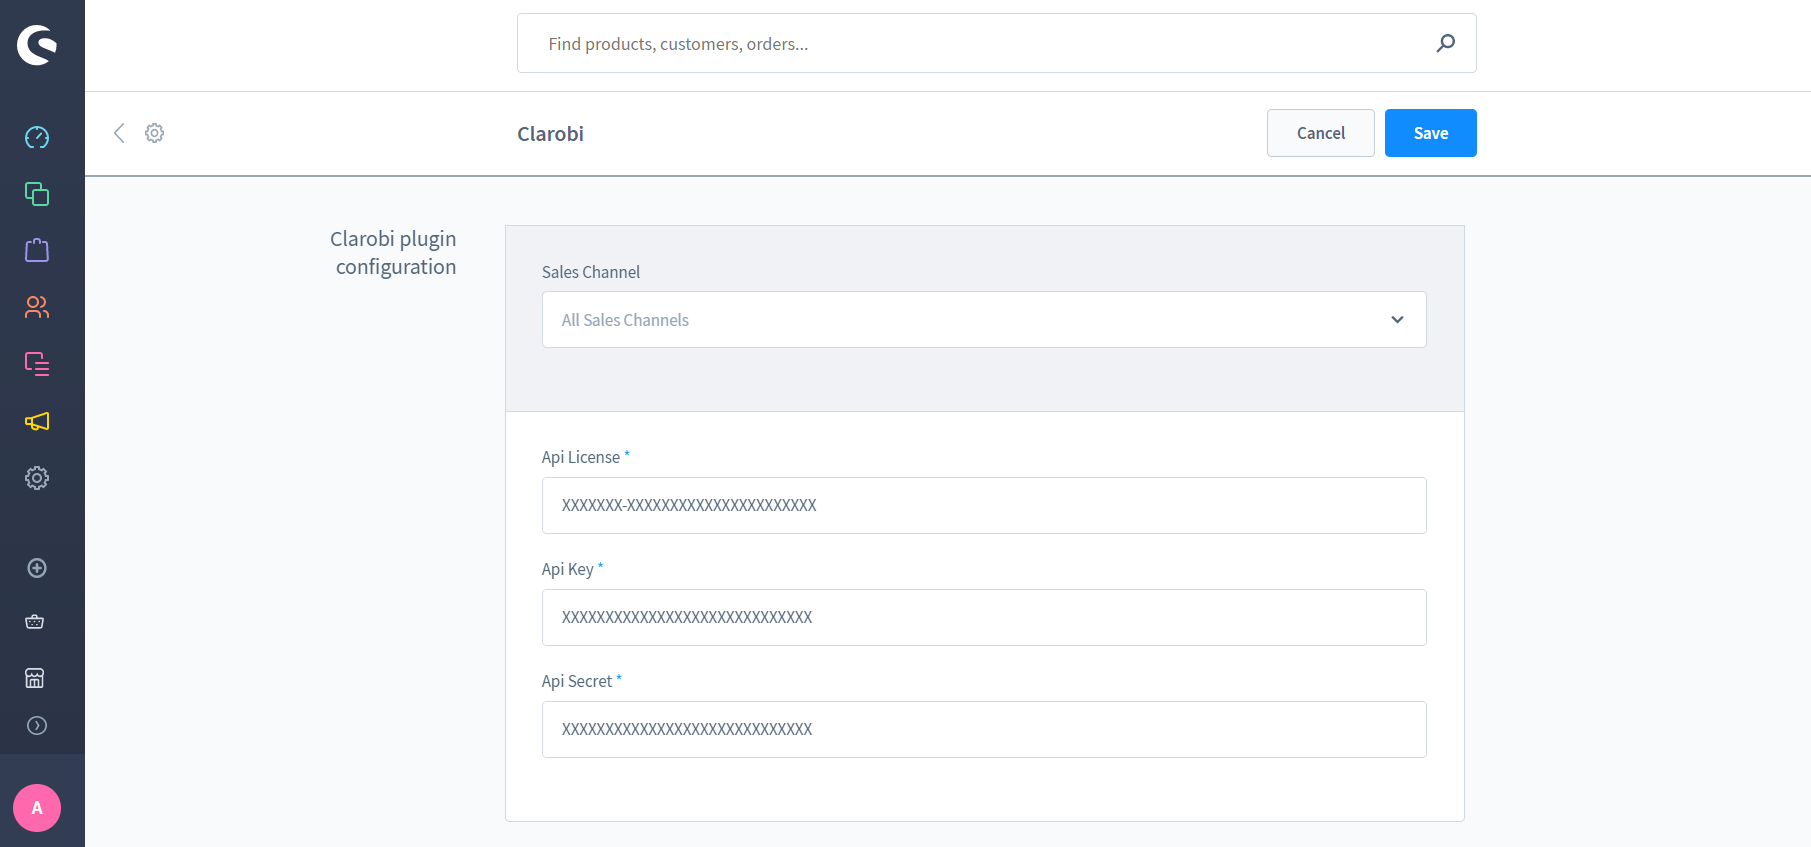
Step 3 - Enter Credentials
Enter your Clarobi Credentials in the Clarobi module configuration form:
- Enter your site credentials including License Key, Api Key and Api Secret.
- Make sure that All Sales Channels is selected under Sales Channel.